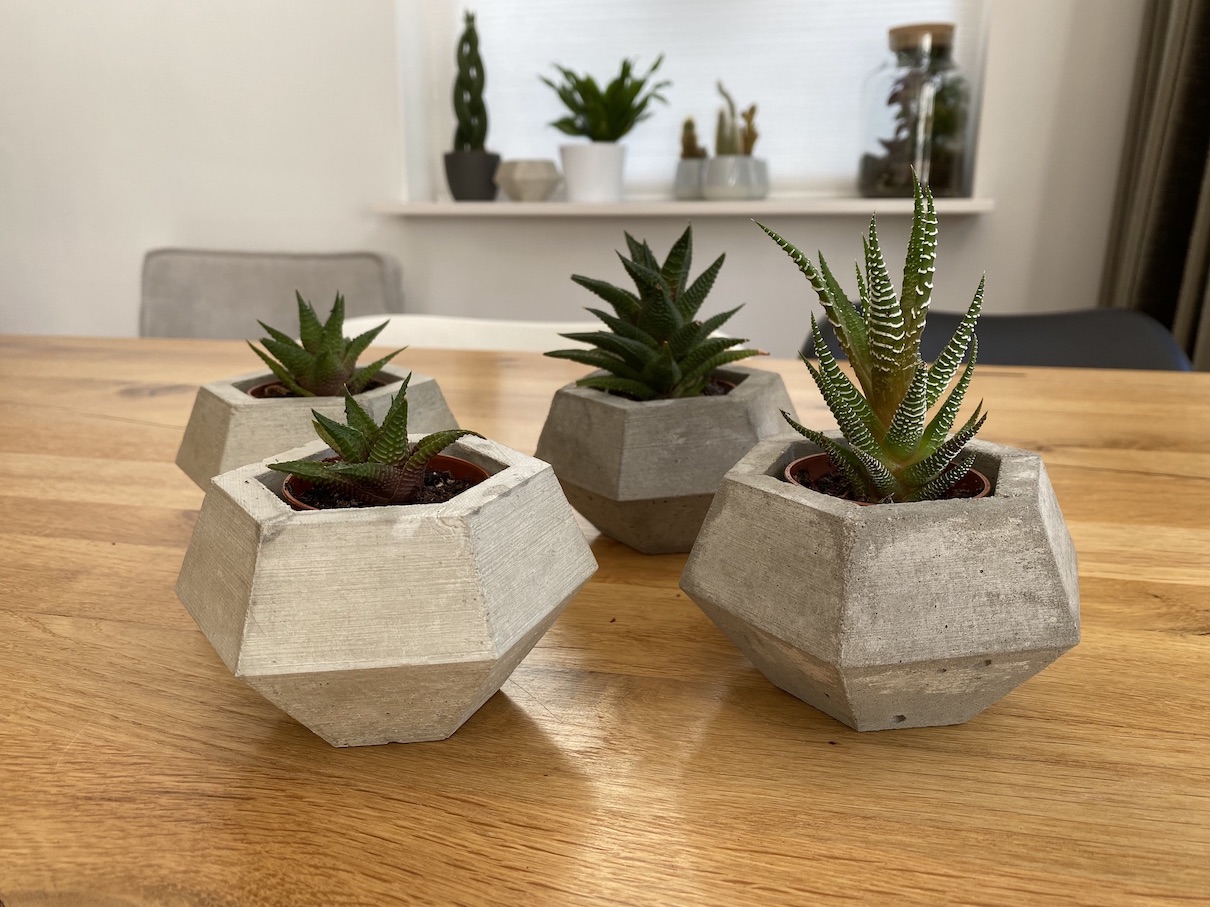
Vers. 2 Concrete mold lampshade / Beton Lampenschirm 21,3x21,3x13,98cm
by Raumwerk Vogler
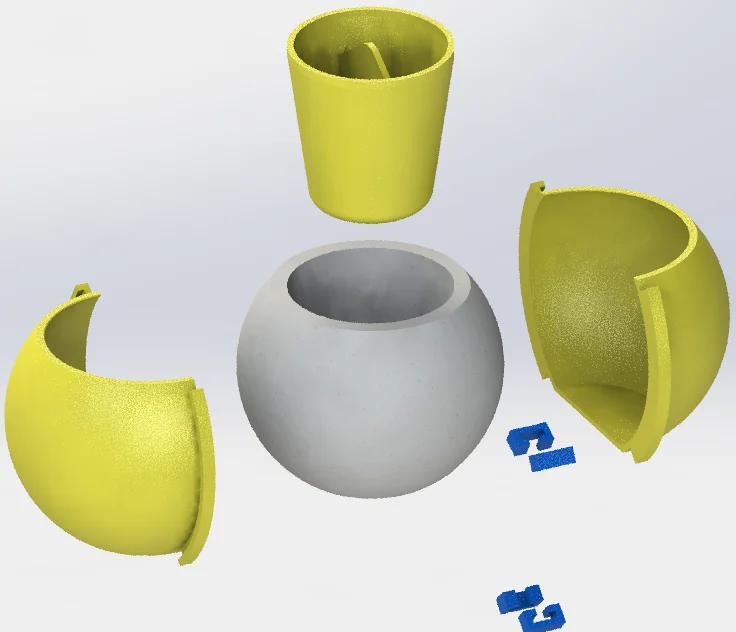
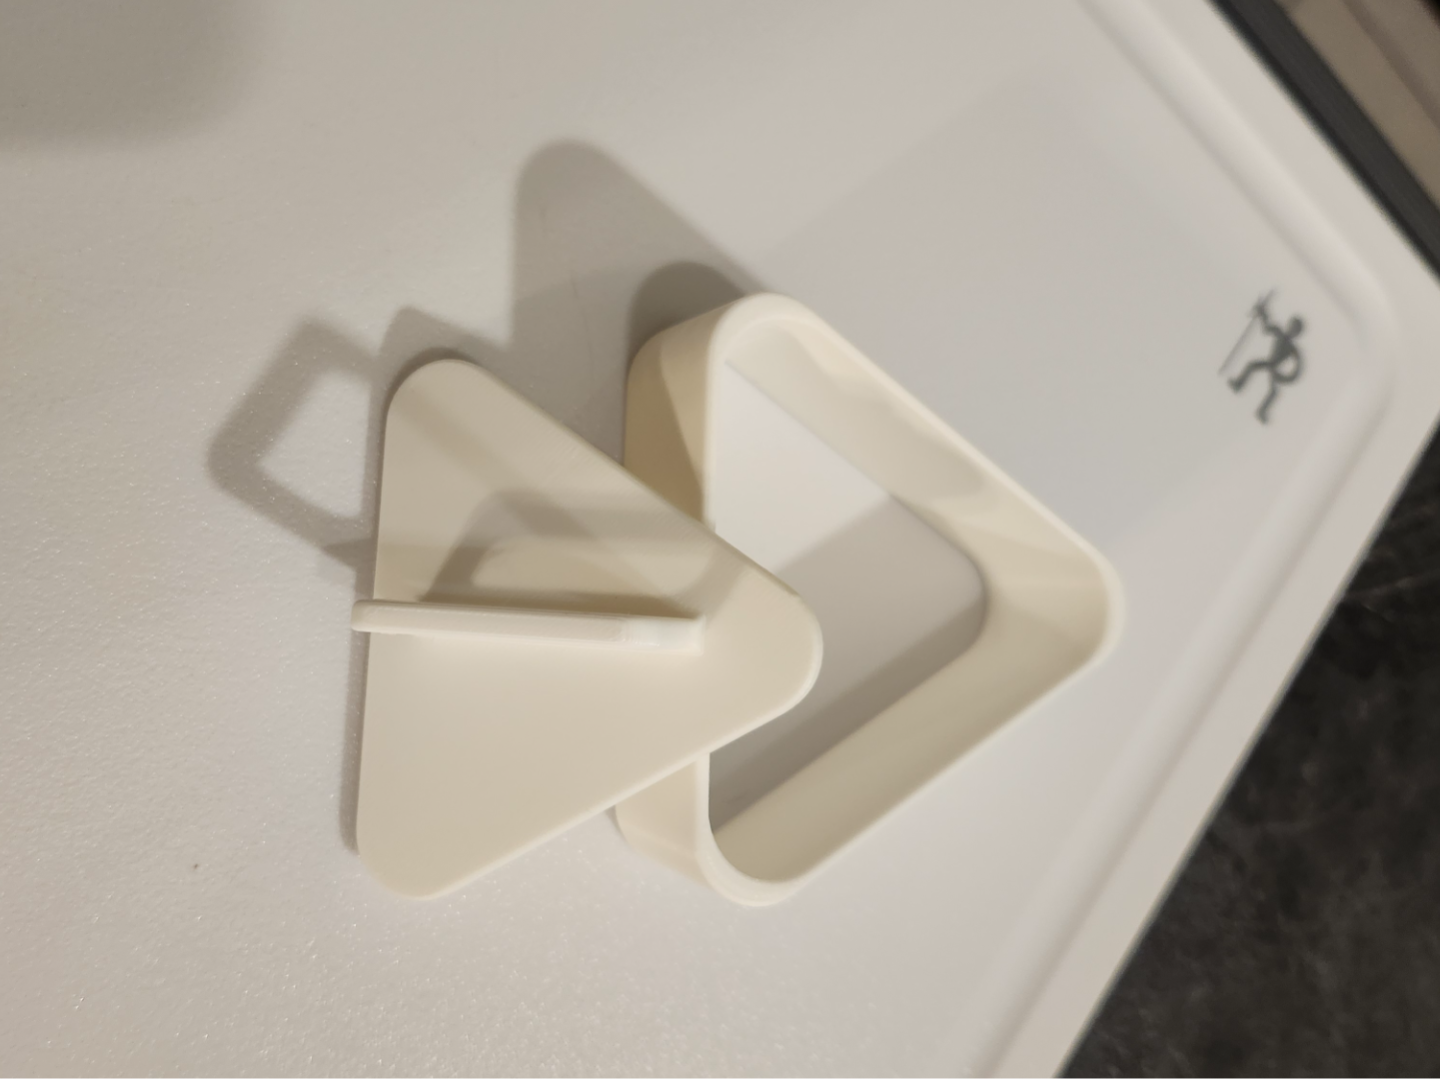
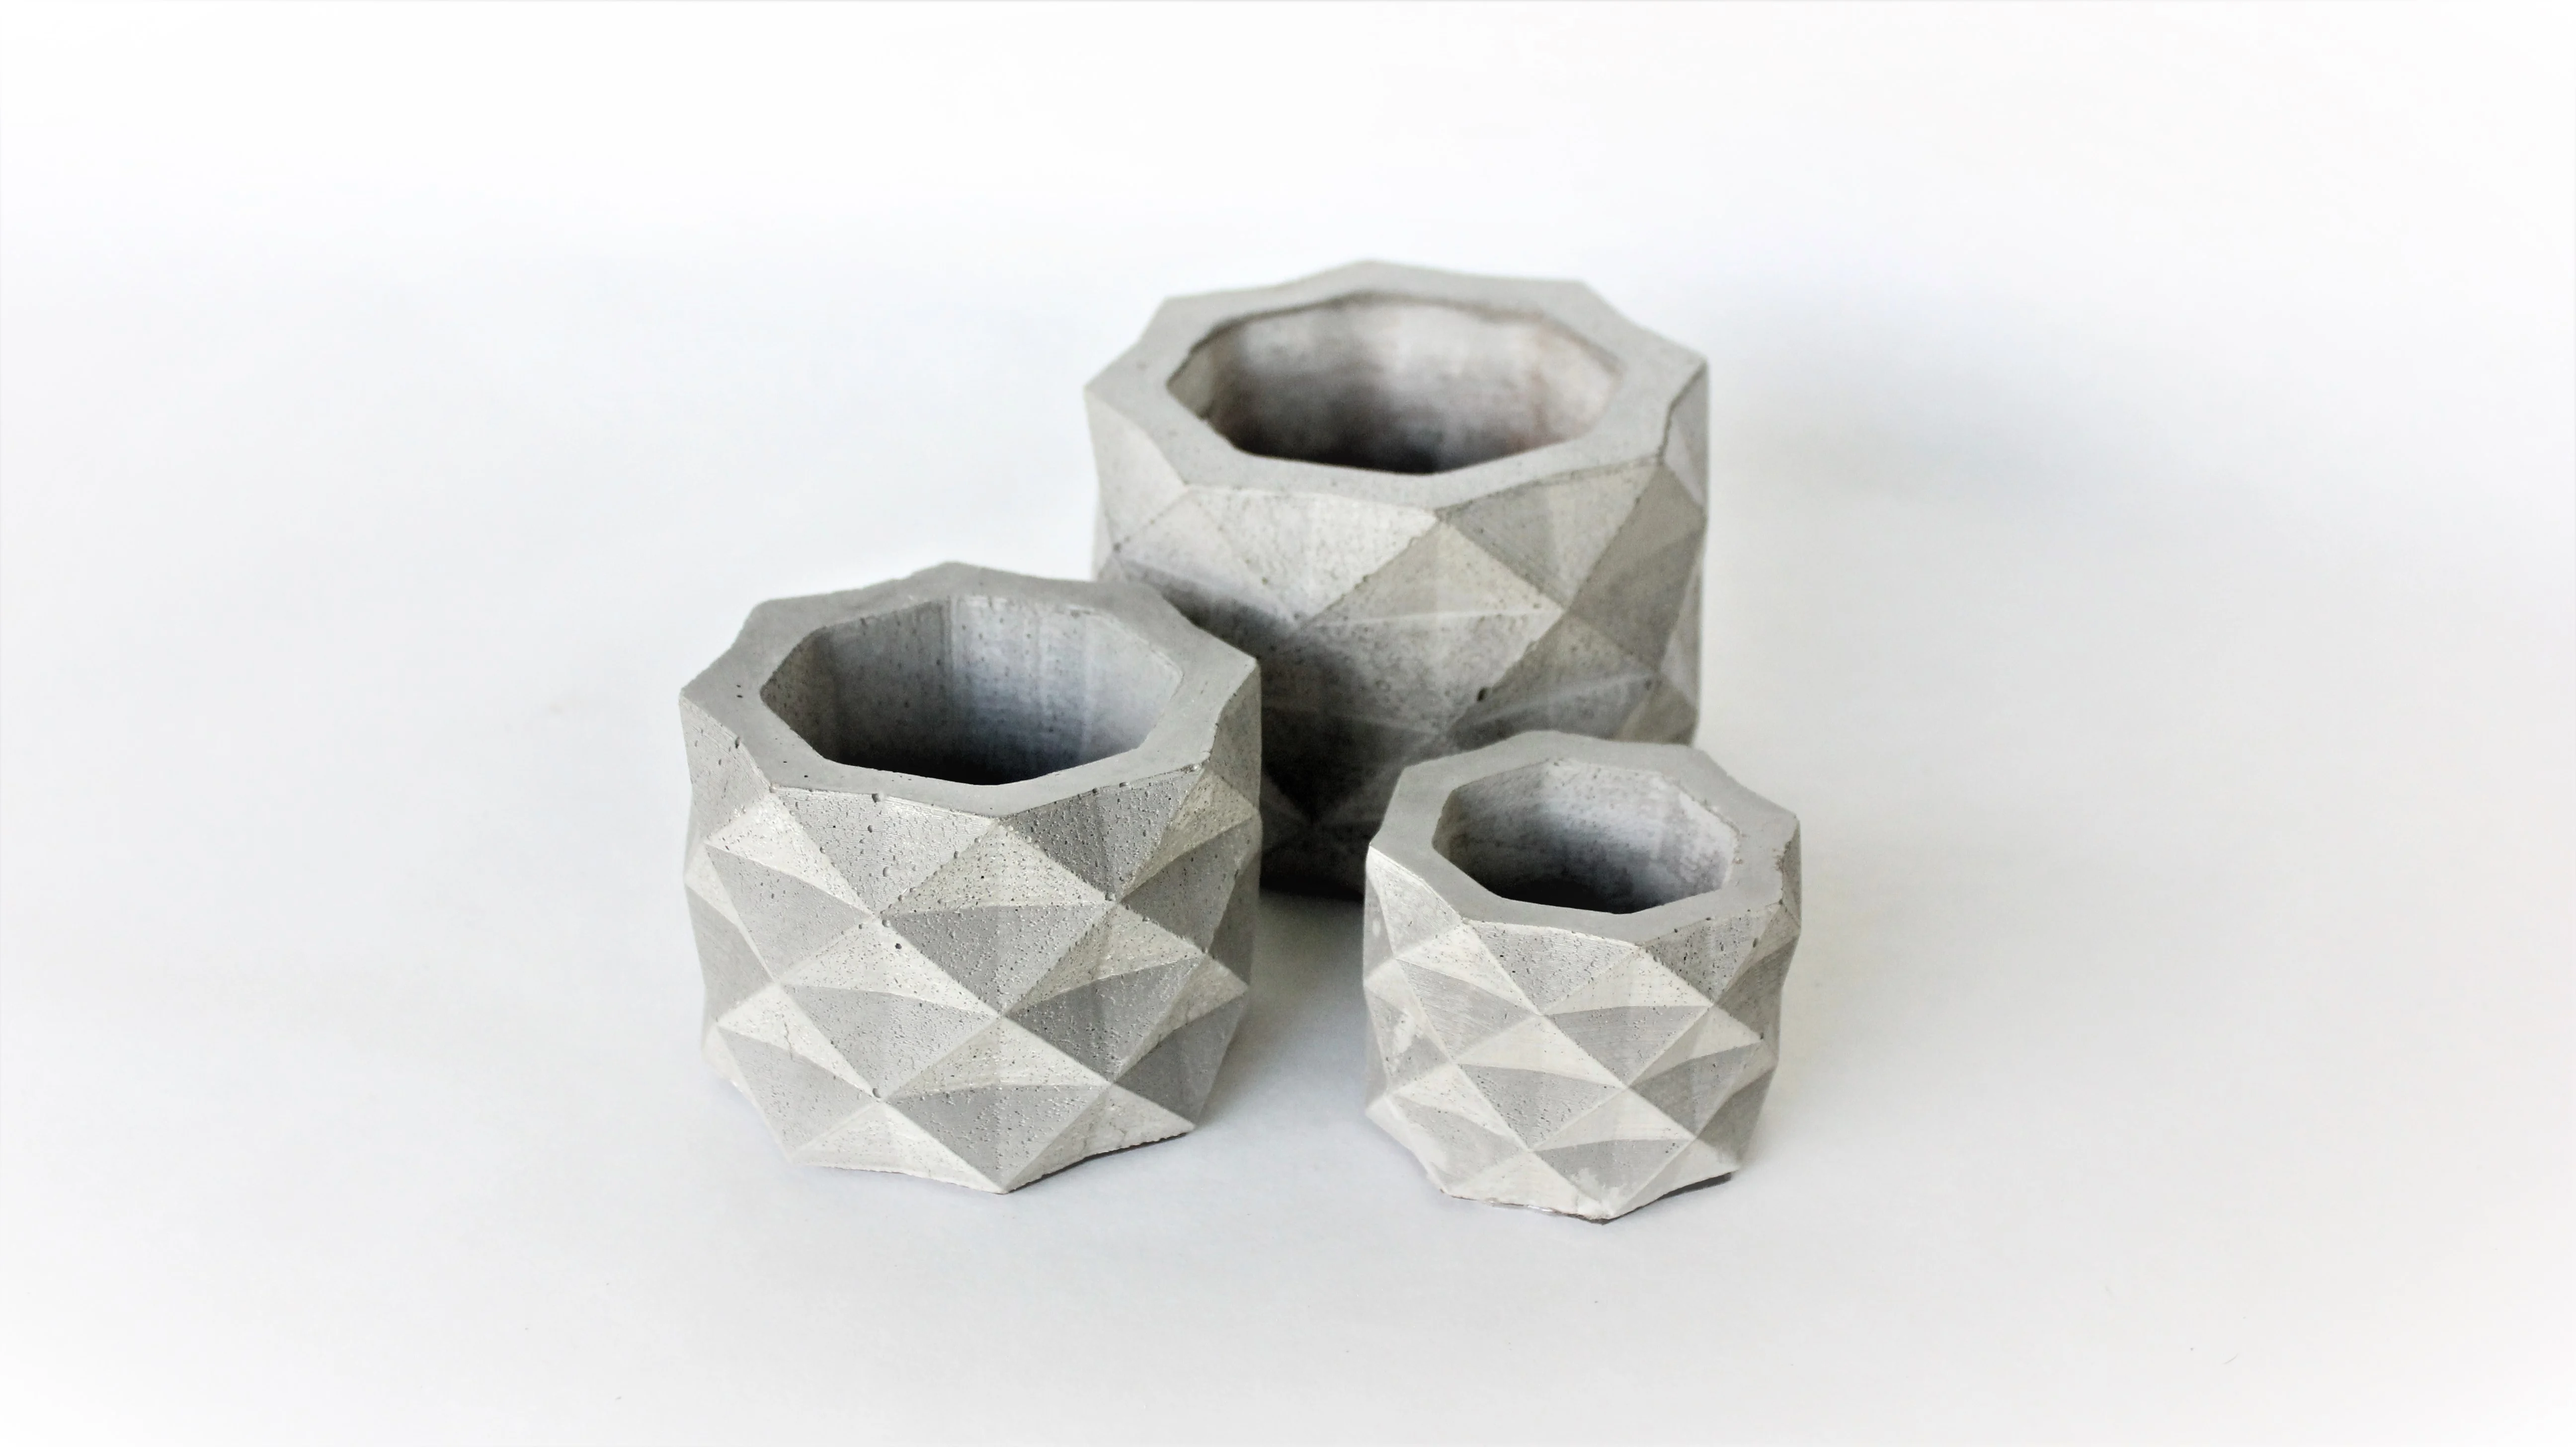
UPDATE 17/02/2023 Added a sanding aid to sand the inner edges of the outer surface of the lampshade after the filling primer __________________________________________________________________________________________ UPDATE 18/02/2023 Added a holder to hang the shade from ceiling for spraypainting it. Holger is printed with 100% infill, in my case with 0.6 on a 0.8 nozzle. __________________________________________________________________________________________ UPDATE 19/02/2023 Added printfiles for some knurled mounting pins for M8 screws in 50mm within the counterparts for the M8 nuts. The covers are scaled to 97,5% in Cura, because they were a little bit to big. The Base is for both parts the same. Just the covers are different. One with and one without a hole. I attached all parts with a little bit of glue, bevause the tollerance of nuts und srews un the hexagon was to 0,9mm from thickness and I printed the parts big enough to get all in. __________________________________________________________________________________________ NEEDED PARTS E27 Holder: https://www.amazon.de/DiCUNO-Vintage-Lampenfassung-Schraube-Gl%C3%BChbirne/dp/B07ZFHRPDV/ref=sr_1_1_sspa?keywords=lampenfassung+e27+vintage&qid=1676641528&sr=8-1-spons&sp_csd=d2lkZ2V0TmFtZT1zcF9hdGY&psc=1 __________________________________________________________________________________________ After not finding a way to print the previous model cleanly, I changed the design of the mold. Now the base mold is used to create and stabilize an inner silicone mold. Before the silicone can be poured into the mold, I treated the prints with spray filler. There follows a 3-fold painting with acrylic paint to make the surfaces more robust. As soon as everything is prepared, the mold is simply assembled with M8 screws and nuts and the master model is filled with silicone on the inside. After the silicone has hardened, the mold is simply unscrewed, the master model is removed and can then be filled with plast
Similar models
%2Fhttps%3A%2F%2Ffbi.cults3d.com%2Fuploaders%2F46195510%2Fillustration-file%2Fd4418727-7bc5-453c-b8d8-beef84cabe26%2FGemini_Generated_Image_ye736pye736pye73.png)